I wanted to beef up my step van’s roof. It had a pretty wimpy translucent fiberglass roof. And I decided I was going to add a layer of cork insulation and aluminum.
So after some searching I found a place a couple of hours away in VT that sold big wide rolls of .04 aluminum. It took a week or so of searching to find it. Most places places don’t sell rolls like that. Most places that sell metal sell it by the sheet like 4×8′ or so.
The light the translucent roof gave was nice, but it was very thin. When it rained it felt like I was in a tent. I encountered this while sleeping in the van for the first time after driving it home from Fargo.
I was just waiting for a leak to spring. So it wasn’t very reassuring and that thing in the summer would heat up like you wouldn’t believe. In fact one sunny day this past summer I touched the metal roof supports called roof bows and they were like burning hot. Kinda like stepping in beach sand on a hot summer day.
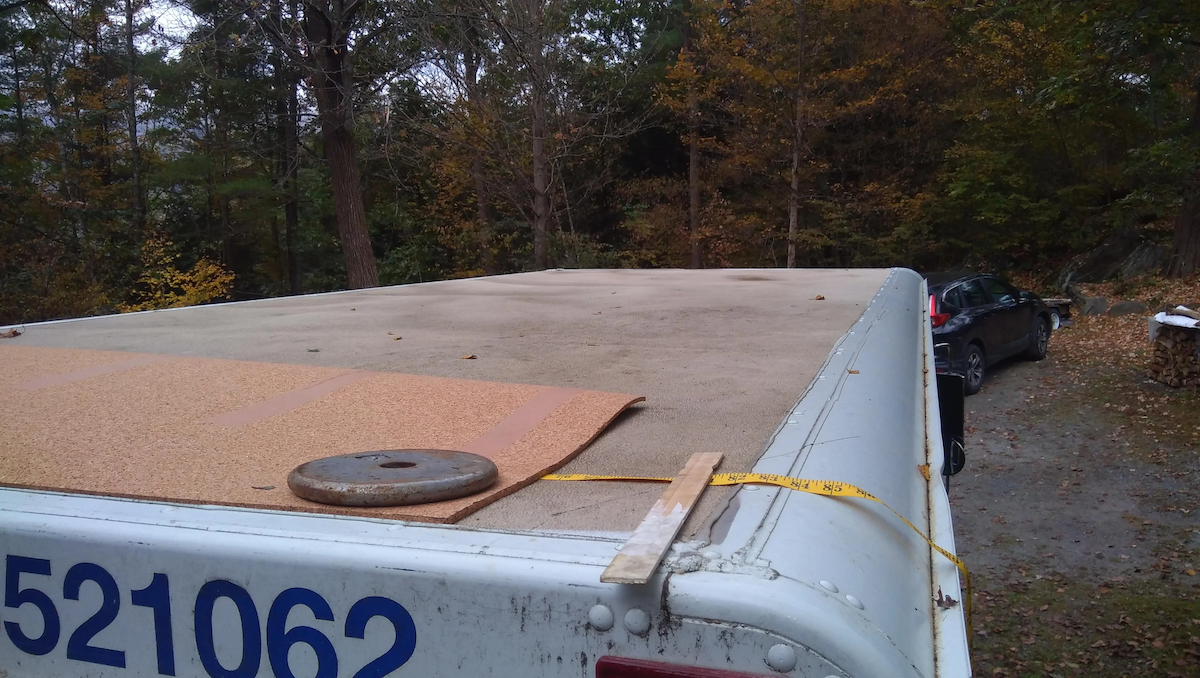
I had lot of doubts about doing this. I wasn’t sure how wide to cut it and was planning originally on cutting it wider that you see in the video thumbnail below and then trying to hammer bend it down on the sides to the little gutter there.
But fortunately I tried a test piece and bending a small piece over the roof side there where it rounds down to the gutter and it didn’t bend like I thought it might. Good thing to test when possible!
So I cut it to just fit on the flat top part of the roof.
I also feared that the roof would crack or something. It was extremely thin. Like thinner than a fiberglass canoe and all bubbly on top. Winter is coming and I also wanted insulation. If I put insulation on top of my van it would be a thermal break and a big score. It wouldn’t get so hot in the summer because the sun’s rays can’t pass through so easily any more and same with the cold!
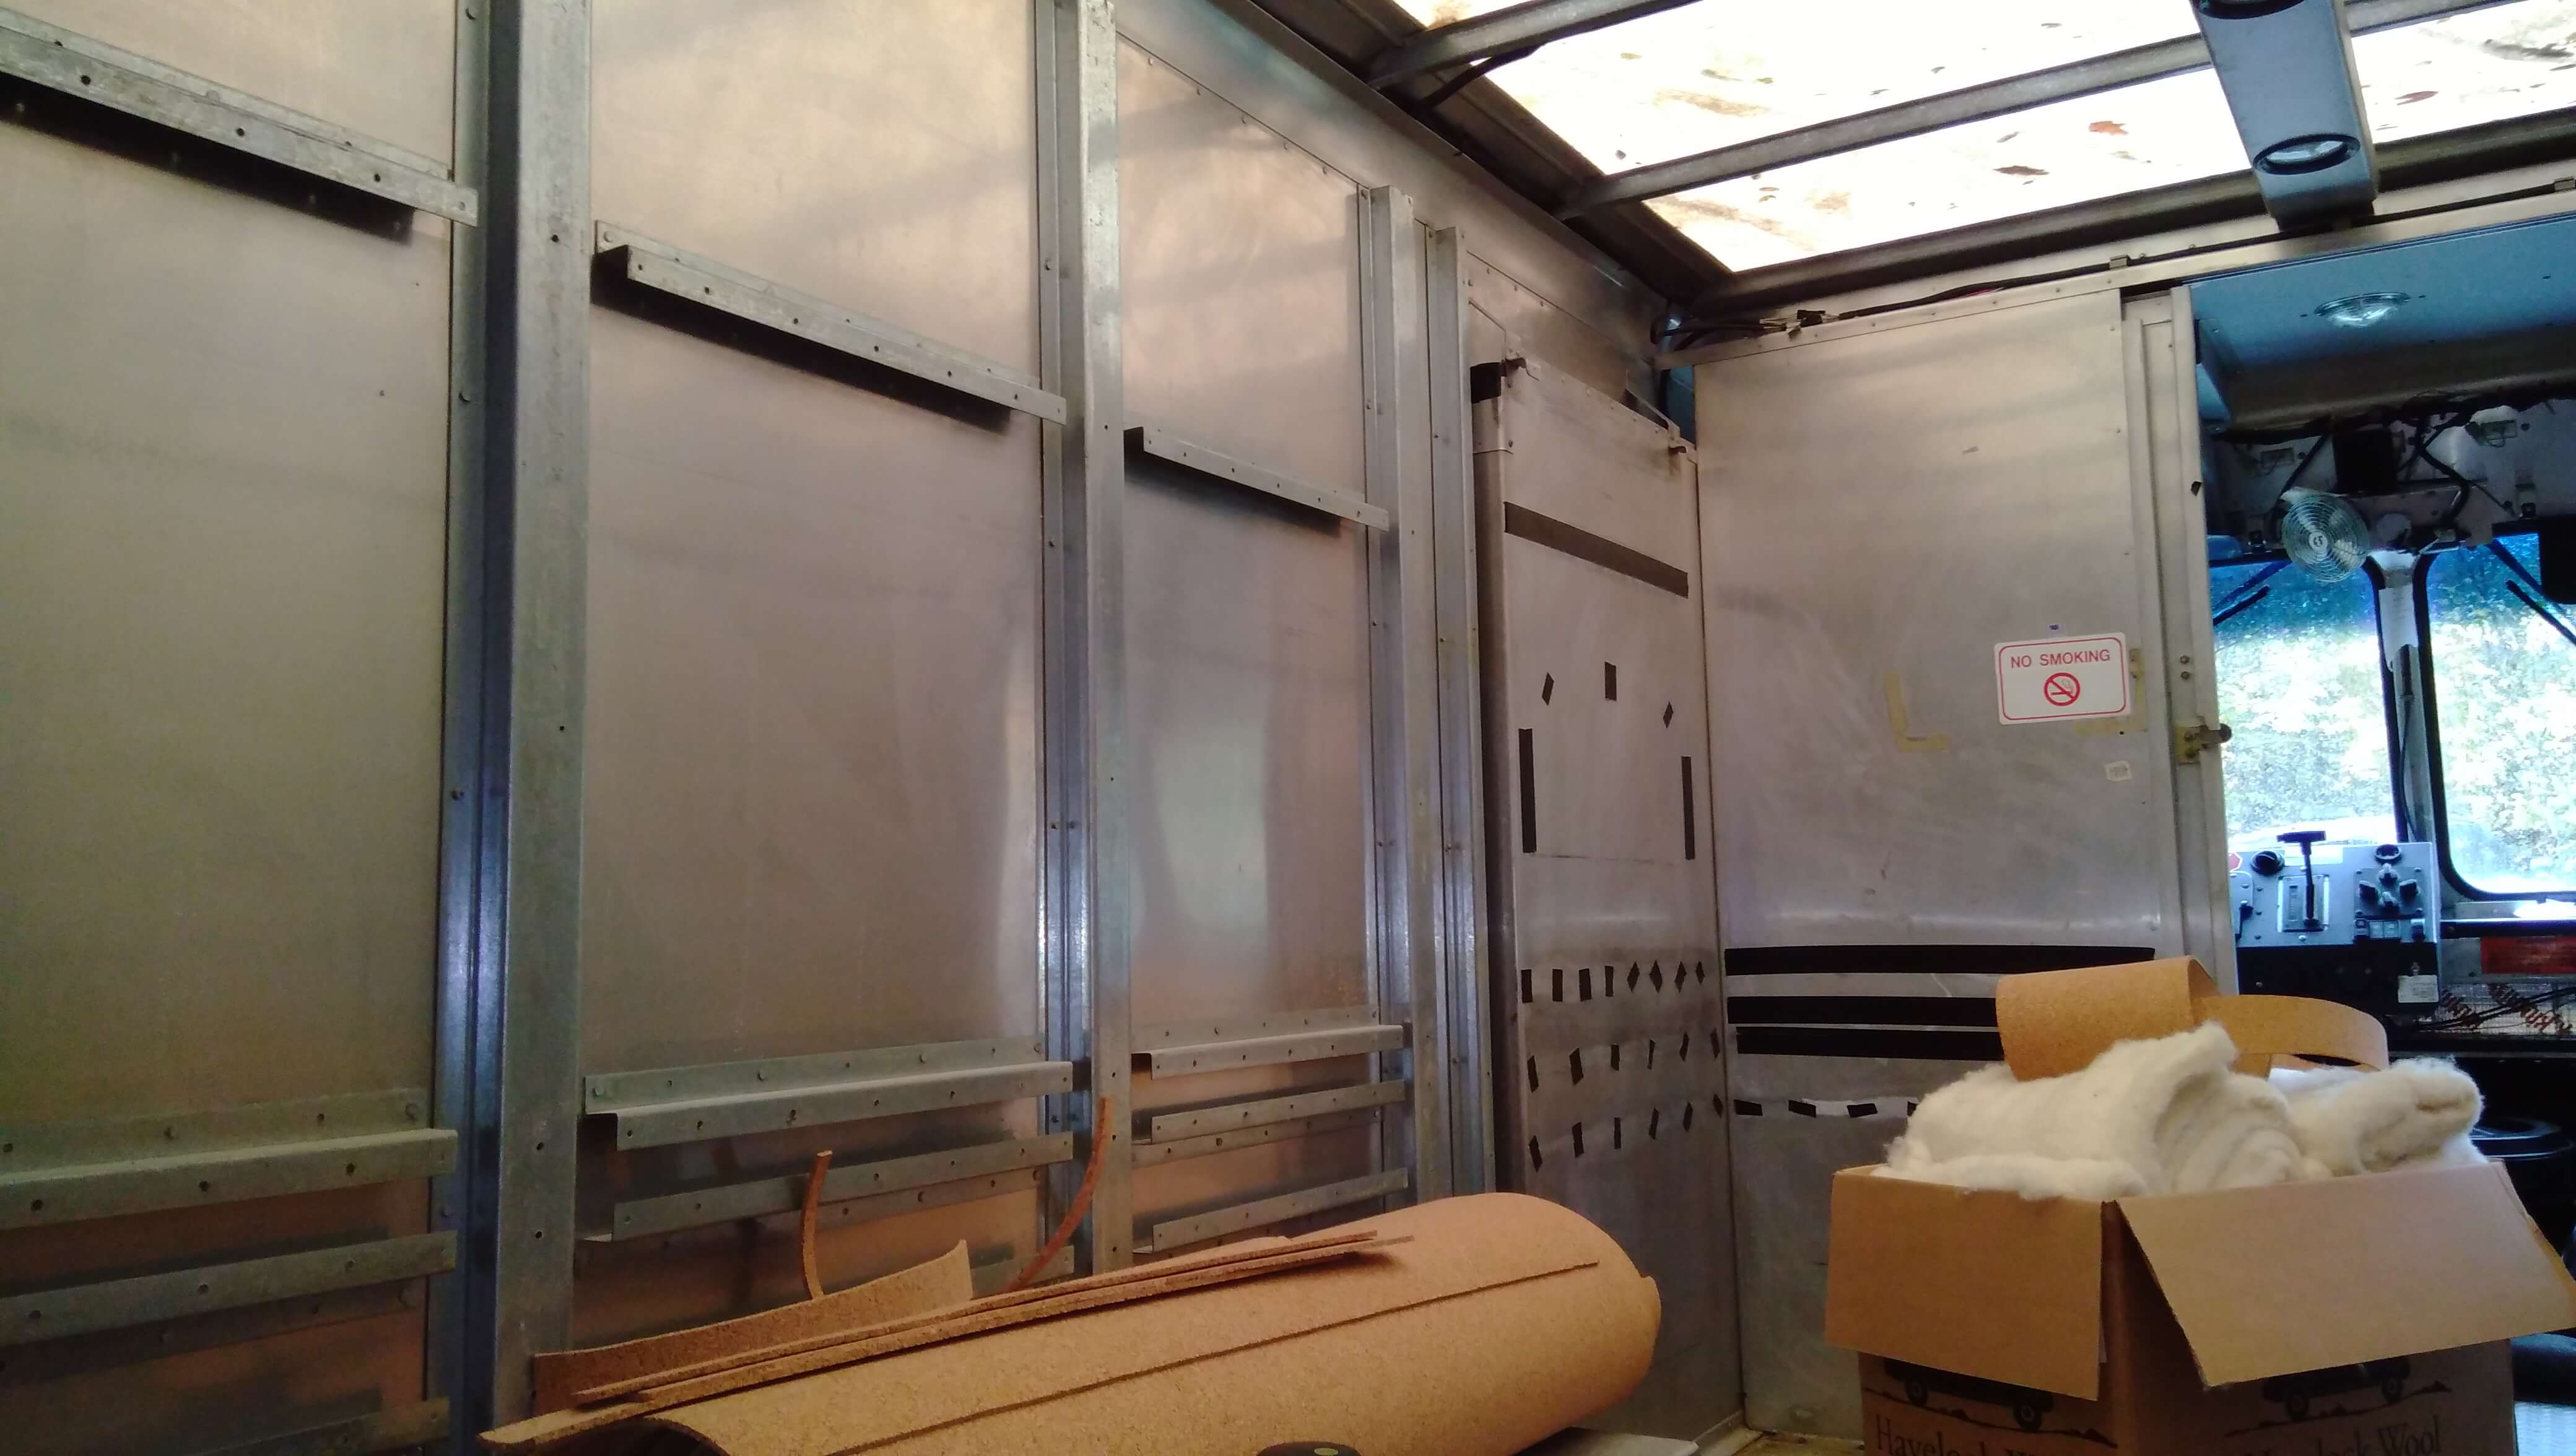
So I taped 1/4 cork underlayment to the roof with butyl flashing tape. I first tried some other Robert’s underlayment tape recommended by home depot for cork but that sucked. Returned it and still had some butyl flashing tape that’s kinda waterproof that I thought I’d try.
That butyl tape stuff is real sticky and similar to the kilmat sound insulation. Sorry I got no pictures of that. I thought of taking a picture after doing the cork and was just in the moment and couldn’t be bothered at that time.
All I did was cut 3 pieces from the 4ft wide roll, put them on the roof covering the cargo area and taped them at the seems and along the sides with the butyl tape. I did add a little glue to the cork as well and sanded down the edges a bit so it would taper well down to the sides where I put the rivets in.
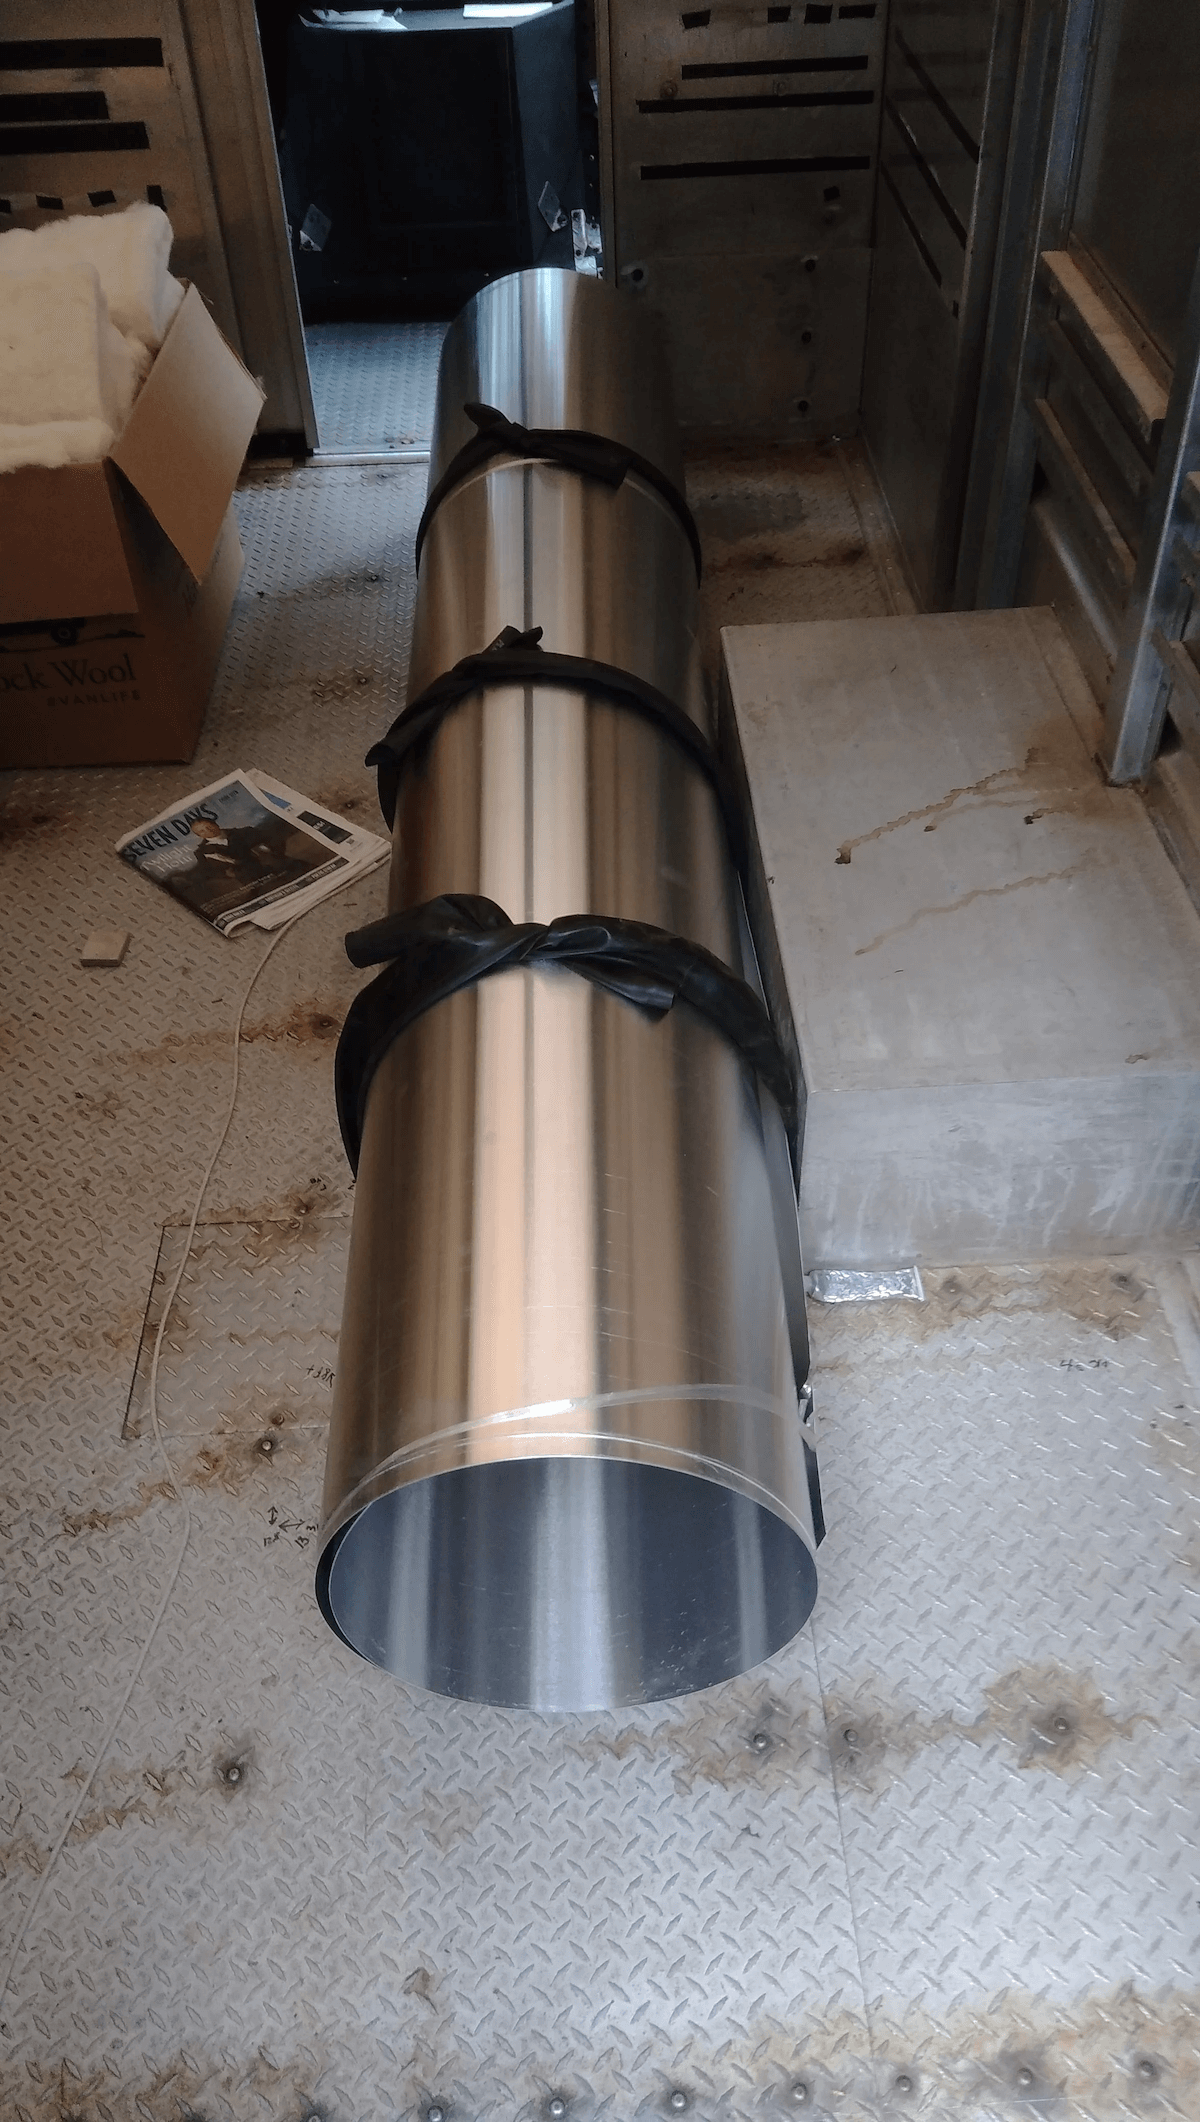
I still had some of that cork which i am going to use on the floor. And then I got this big roll of 12×9 or so feet of .04 aluminum.
That was like $430 or so at the heavy duty truck store (aluminum coil). I also got some more roof bows to support the roof. The roof bows were 24 inches apart and then I added another inbetween. And then I riveted the aluminum to the roof. I used mostly solid rivets but also some sealed pop rivets.
Riveting an aluminum roof to my step van
Update: I did get some leaks because of this and seemed to have fixed them but would do a few things differently.
I would have just used the sealed pop rivets instead of trying to use solid rivets. The solid rivets required two people and I didn’t have the right tools which caused some rivets to bend and those rivets eventually leaked.
The sealed pop rivets I used on the front seam and they are just way easier. I would have just used them all around. I guess I didn’t at the time because I thought they wouldn’t be strong enough.
The hammer I think caused some damage and bent some of the roof rail because on the other side sometimes the tool my dad used to place under the rivet would slip off the rivet and I would strike the top of it and if there is nothing under it then the roof takes the strike.
Another problem I had was the Sikaflex didn’t stick well to that aluminum coil I think cause it was so polished or had something on it but the Sikaflex sticks very well to the aluminum inside my van. I used it to glue wood to aluminum and steel in the van and it is very strong there.
The Sikaflex peeled off the seams in some spots. I later took a wire wheel to the aluminum to scratch it up and the Sikaflex seemed to stick better to that.
The 3m double sided tape which was supposedly super strong didn’t hold the front aluminum down instead I would have just put some sikaflex under this and compress it with weight. I have since done this.
Things learned from these leaks.
- Use the sealed pop rivets because they are easier and you didn’t have the right tools or experience with solid rivets
- Put a sealant under the sheet of aluminum between the original roof
- Scratch up the aluminum where you will put the sealant
- Test everything before you commit or put holes in your roof
Now I will…
- Scratch up the aluminum
- Reseal the seams with Sikaflex
- Reseal the edges with Eternabond tape
- Use a white rubberized roof coating over the rivets for additional waterproofing
For some reason things didn’t stick well to that aluminum roof coil.
- Sikaflex failed
- Gorilla waterproof tape bubbled and failed after the first rain
- 3M double sided tape failed
- Fast seal RV tape didn’t stick that well on a test piece
So now I will test Eternabond tape hopefully that will work
Old post continued…
1st I had to remove around 46 rivets holding the fiberglass in place to the roof bows. That’s not fun. Then chose the type of rivet. Ahh, another decision to make. So many decisions to make with this van.
Solid rivets are stronger but they are trickier and you need another person if you can’t access both sides. Pop rivets are easier and you can get one of these tools I got on Amazon. But they are not as strong or waterproof. I was going to use just sealed pop rivets which are more waterproof, but I just decided on solid rivets like used in the body of the van. The step van is held together by mostly rivets.
I didn’t cover the whole roof just the cargo area where I’d be staying. I am planning on adding a loft and raising part of the roof above the drivers area, but I wasn’t quite ready.
To be continued hasta…
Tools and products used:
- Cork 1/4 inch 200sq ft
- Akktol rivet gun
- Sikaflex 227 or Sikaflex 221 is similar